JSX 说明
在绝大多数情况下,Vue 推荐使用模板语法来创建应用。然而在某些使用场景下,我们真的需要用到 JavaScript 完全的编程能力。这时渲染函数就派上用场了
模板写法
<template>
  <div class="counter">
    <div class="text">Count: {{state.count}}</div>
    <button class="btn" v-on:click="onClick">Add</button>
  </div>
</template>

<script setup>
  import { reactive } from 'vue';
  const state = reactive({
    count: 0
  });
  const onClick = () => {
    state.count ++;
  }
</script>

<style>
.counter {
  padding: 10px;
  margin: 10px auto;
  text-align: center;
}

.counter .text {
  font-size: 28px;
  font-weight: bolder;
  color: #666666;
}

.counter .btn {
  font-size: 20px;
  padding: 0 10px;
  height: 32px;
  min-width: 80px;
  cursor: pointer;
}
</style>
JSX 写法
所有 JSX 写法中都是用单大括号“{state.count}”来作为内部变量处理,而 Vue.js 3 模板语法是通过双大括号来表示“ {{state.count}} ”
import { defineComponent, reactive } from 'vue';

const Counter = defineComponent({
  setup() {
    const state = reactive({
      count: 0
    });
    const onClick = () => {
      state.count ++;
    }
    return {
      state,
      onClick,
    }
  },

  render(ctx) {
    const { state, onClick } = ctx;
    return (
      <div class="counter">
        <div class="text">Count: {state.count}</div>
        <button class="btn" onClick={onClick}>Add</button>
      </div>
    )
  }
});

export default Counter;
一个复杂对话框的例子
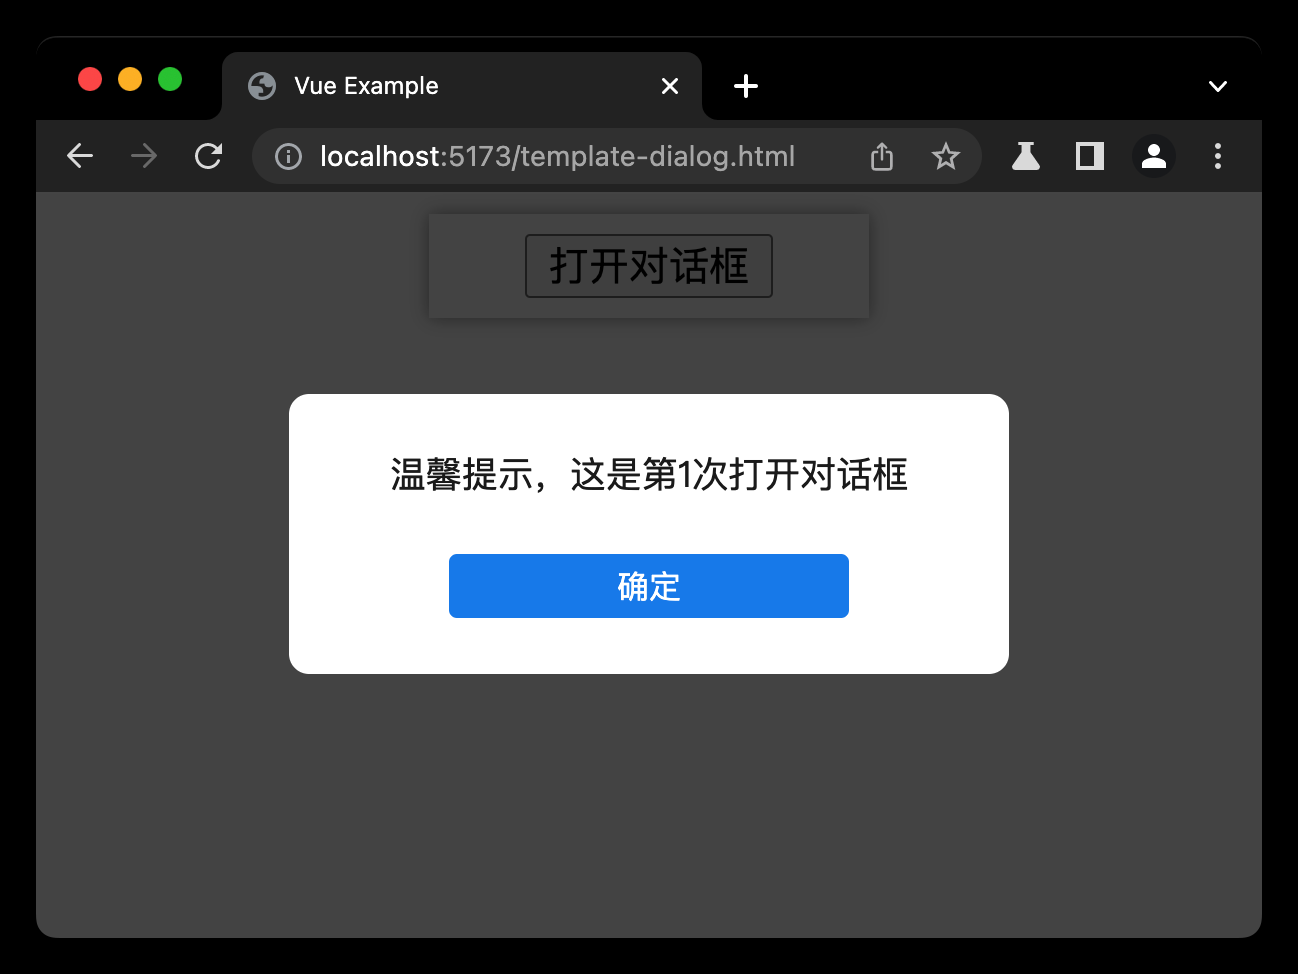
模板方式实现
对话框
<template>
  <div v-if="props.show" class="v-dialog-mask">
    <div class="v-dialog">
      <div class="v-dialog-text">
        {{props.text}}
      </div>
      <div class="v-dialog-footer">
        <button class="v-dialog-btn" @click="onOk">确定</button>
      </div>
    </div>
  </div>
</template>
<script setup >
import { toRef, toRefs, computed } from 'vue';
const props = defineProps({
  text: String,
  show: Boolean,
});
const emits = defineEmits(['onOk']);

const onOk = () => {
  emits('onOk');
}
</script>
<style>
/* 完整样式代码请看后续附带仓库链接 */
</style>
使用对话框
<template>
  <div class="app">
    <button class="btn" @click="onClickOpenDialog" >打开对话框</button>
  </div>
  <Dialog
    :show="showDialog"
    :text="showText"
    @onOk="onDialogOk"
  />
</template>
<script setup>
import { ref } from 'vue';
import Dialog from './dialog.vue';

const showDialog = ref(false);
const showCount = ref(0);
const showText = ref('温馨提示,这是一个对话框')

const onClickOpenDialog = () => {
  showDialog.value = true;
  showCount.value += 1;
  showText.value = `温馨提示,这是第${showCount.value}次打开对话框`
}

const onDialogOk = () => {
  showDialog.value = false;
}
</script>
<style>
/* 完整样式代码请看后续附带仓库链接 */
</style>
上述是用模板语法实现的对话框“条件动态”显示,你能看到,如果要控制一个对话框显示,不仅需要一个变量 showDialog 来控制,还需要把一个 <Dailog> 标签埋在模板里
JSX 实现
import { defineComponent, reactive, createApp, h, toRaw } from 'vue';

const Dialog = defineComponent({
  props: {
    text: String,
  },
  emits: [ 'onOk' ],
  setup(props, context) {
    const { emit } = context;
    const state = reactive({
      count: 0
    });
    const onOk = () => {
      emit('onOk')
    }
    return {
      props,
      onOk,
    }
  },
  render(ctx) {
    const { props, onOk } = ctx;
    return (
      <div class="v-dialog-mask">
        <div class="v-dialog">
          <div class="v-dialog-text">
            {props.text}
          </div>
          <div class="v-dialog-footer">
            <button class="v-dialog-btn" onClick={onOk}>确定</button>
          </div>
        </div>
      </div>
    )
  }
});

export function createDialog(params = {}) {
  const dom = document.createElement('div');
  const body = document.querySelector('body');
  body.appendChild(dom);
  const app = createApp({
    render() {
      return h(Dialog, {
        text: params.text,
        onOnOk: params.onOk
      })
    }
  });
  app.mount(dom)

  return {
    close: () => {
      app.unmount();
      dom.remove();
    }
  }
};
如何使用 JSX
import { createDialog } from './dialog';

// ...
const dialog1 = createDialog({
  text: `温馨提示,这是第1个对话框`,
  onOk: () => {
    dialog1.close();
  }
});

const dialog2 = createDialog({
  text: `温馨提示,这是第2个对话框`,
  onOk: () => {
    dialog2.close();
  }
});